Step 1: Define the Chat Assistant’s Purpose and Capabilities
Begin by specifying what you want your Chat Assistant to do. Chat Assistants can be designed to:- Answer user questions related to your app’s features, services, or any other relevant information.
- Perform specific actions within the app, such as updating profile images, modifying settings, or guiding users through certain workflows.
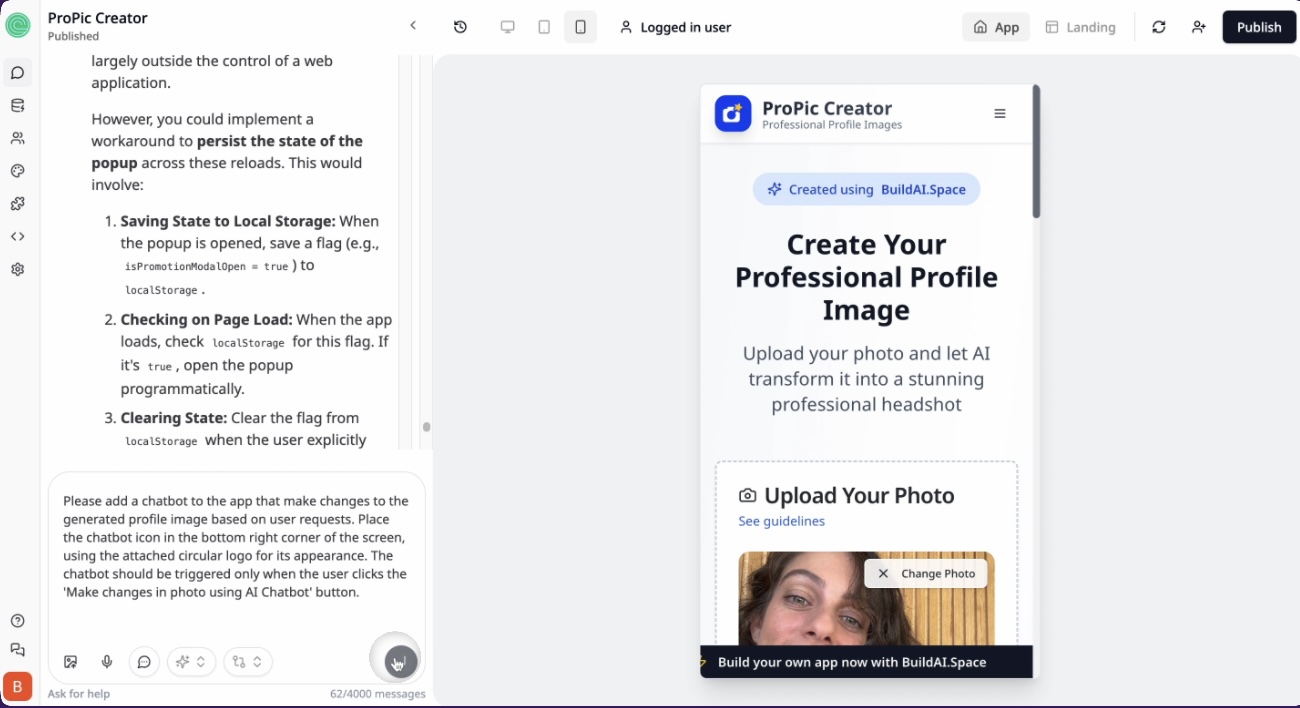
“Please add a Chat Assistant that can make changes to the generated profile image based on user requests.”This means users can interact with the Chat Assistant to ask for modifications like changing the color of a jacket in their profile photo or adjusting the smile size, creating a convenient and interactive experience.
Step 2: Specify Chat Assistant and Branding
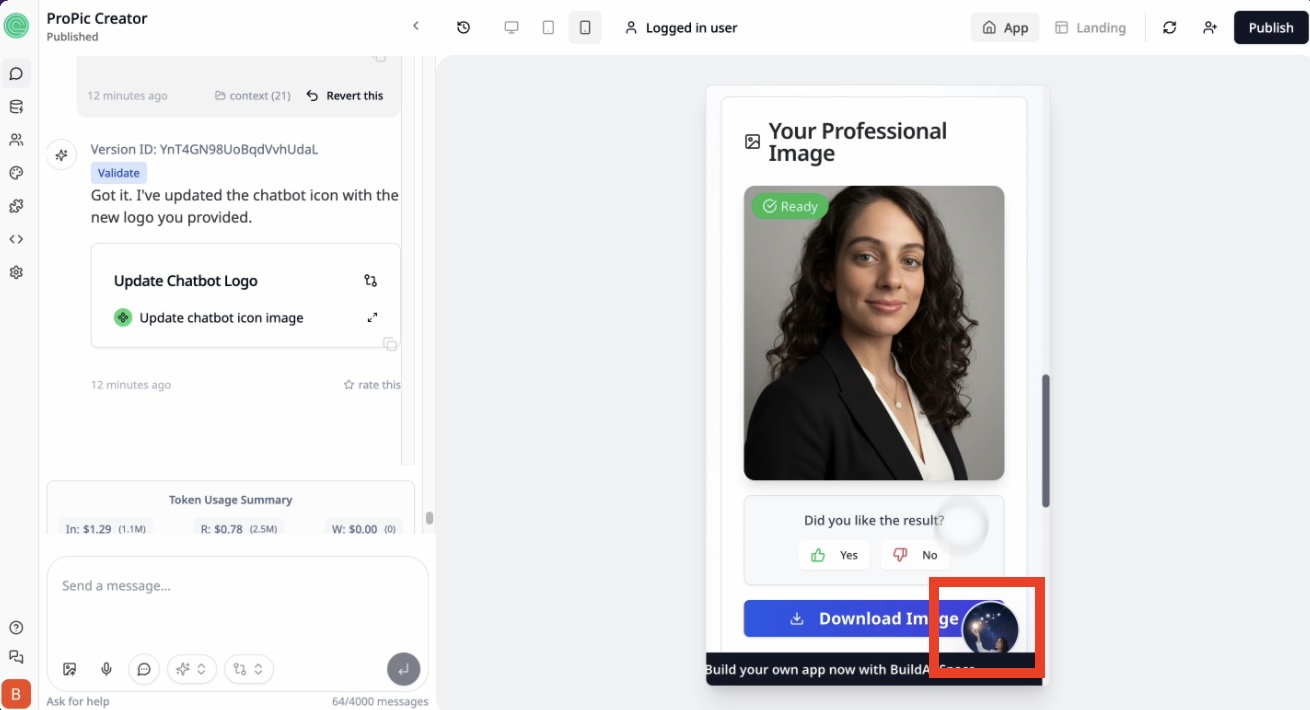
Decide where the Chat Assistant icon should appear on your app’s interface and how it should be visually represented to maintain your app’s branding.- Placement: A common and user-friendly spot is the bottom right corner of the screen.
- Appearance: Use your own logo or icon, ideally shaped (e.g., circular) to keep it clean and consistent with your app’s design.
“Add the Chat Assistant icon in the bottom right corner of the app, using my attached circular logo for its appearance.”Here’s how you might visually communicate this to your builder when requesting:
 After adding the Chat Assistant, it might look like this in the app interface:
Step 3: Define How the Chat Assistant is Triggered
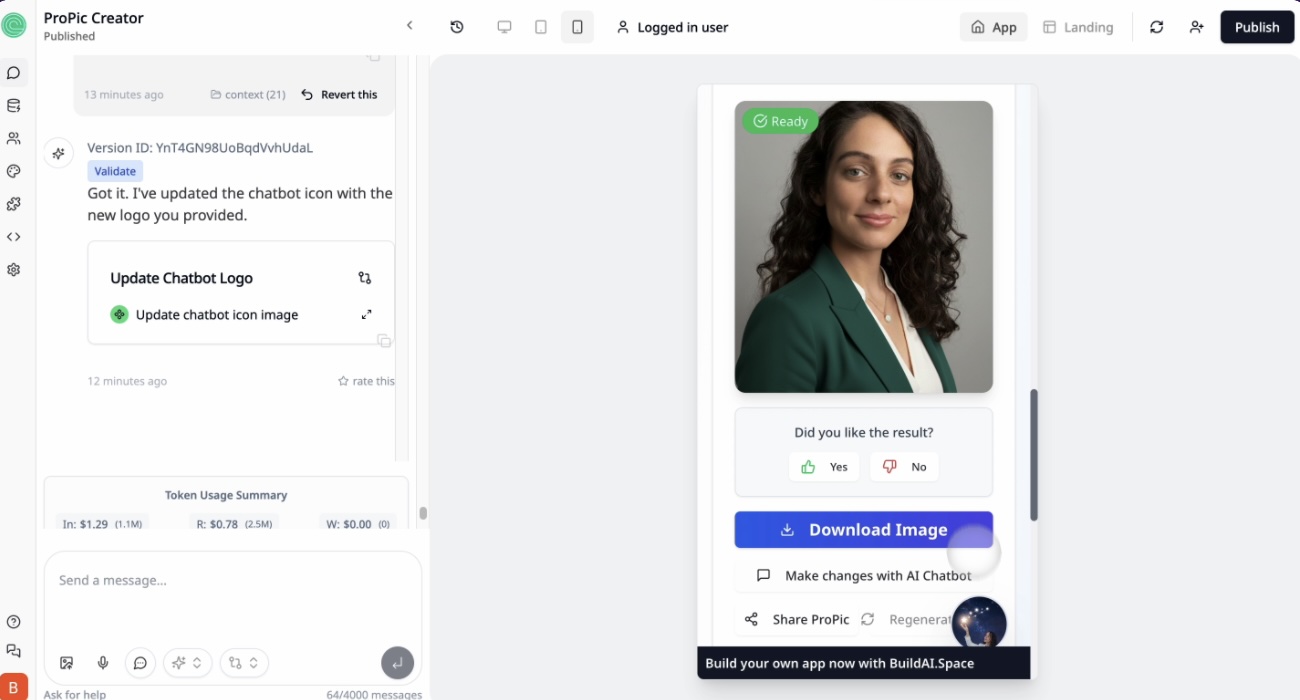
Determine how users will activate or open the Chat Assistant. Common trigger methods include:- Clicking a specific button (e.g., “Make changes in photo using AI Chat Assistant”).
- Performing a certain user action or event.
- Automatically opening the Chat Assistant on visiting particular app pages or sections.
“The Chat Assistant should open only when the user clicks the button labeled ‘Make changes in photo using AI Chat Assistant’.”This approach keeps the interface clean and ensures the Chat Assistant appears contextually when users want to interact.
Step 4: Example of Chat Assistant Interaction and Modification Request
Once the Chat Assistant is active, users can type specific instructions to modify their profile images or get help. Here’s an example conversation and the resulting image update: User requests a change through the Chat Assistant interface: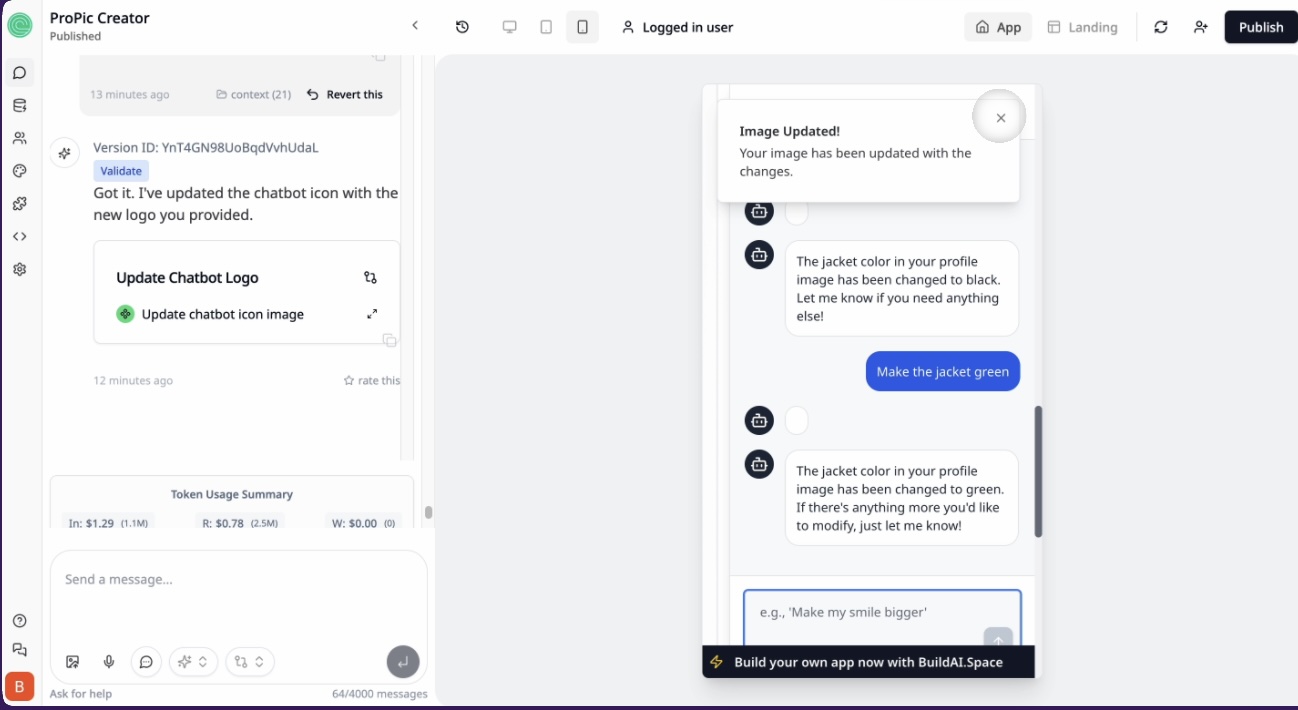 The Chat Assistant confirms the update and shows the modified image:
Summary: Sample Request Template for Your App Builder
To make it easy, here’s a comprehensive message you can send to your app builder, combining all the key points:“Please add a Chat Assistant to the app that can answer questions and make changes to the generated profile image based on user requests. Place the Chat Assistant icon in the bottom right corner of the screen, using the attached circular logo for its appearance. The Chat Assistant should be triggered only when the user clicks the ‘Make changes in photo using AI Chat Assistant’ button.”
By following these steps and including clear examples, you’ll ensure your app builder understands exactly how to implement a useful, branded, and user-friendly Chat Assistant that enhances your app’s functionality and user satisfaction.