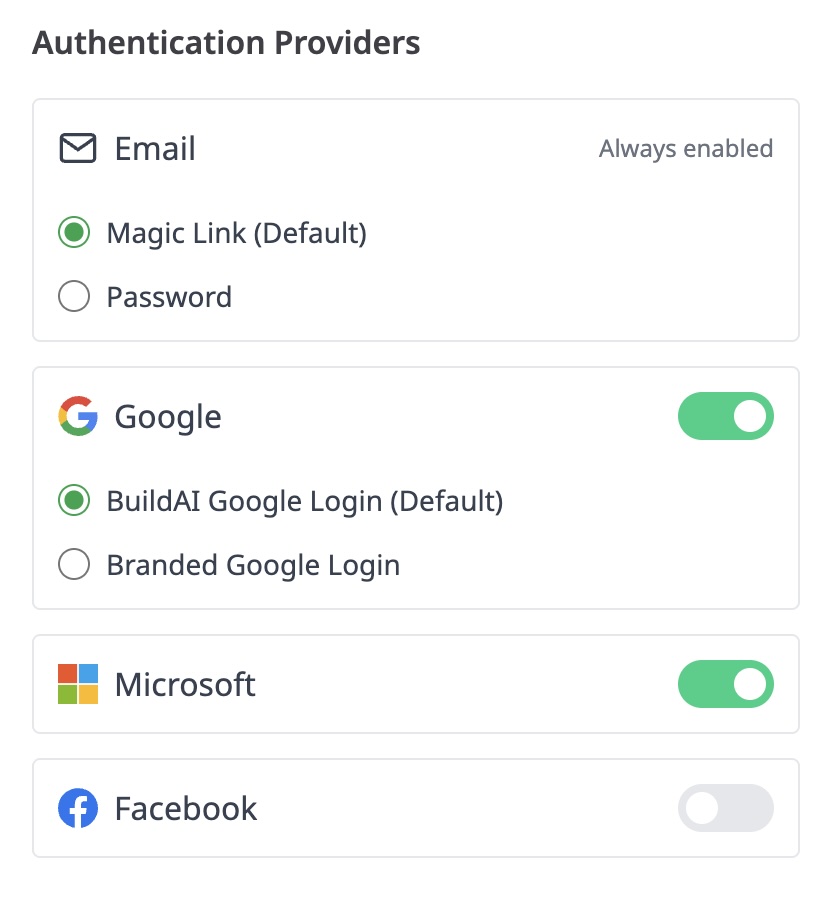
Step 1: Choose Your Authentication Providers
In your app settings section, you can enable or disable different login methods based on your preference and user needs. The available options include:-
Email Authentication
Choose between Magic Link (default) or Password login for email-based authentication. -
Google Login
Enable Google login with the option to use the default BuildAI Google Login or a Branded Google Login. -
Microsoft Login
Enable Microsoft account login for your users.
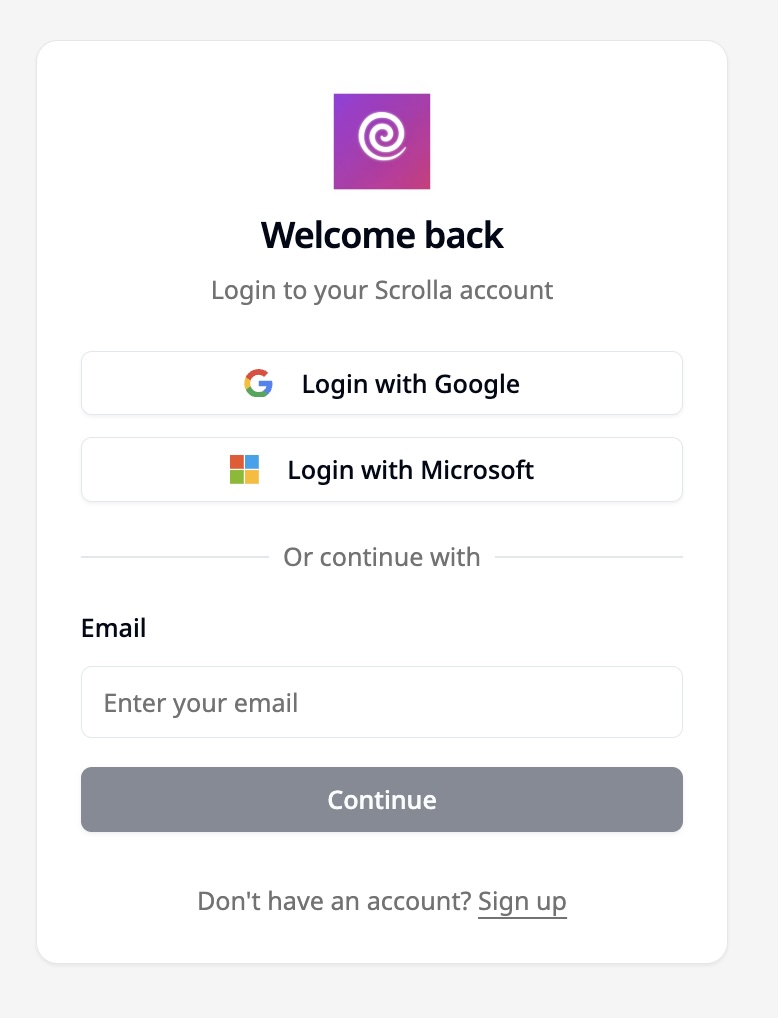
Step 2: User Login Screen with Enabled Options
Once you have configured your preferred login options, users will see a streamlined login screen that reflects your selections. For example, if Google and Microsoft login are enabled, along with email login via Magic Link, the login screen will display:- Buttons for Login with Google and Login with Microsoft
- An email field for users to enter their email and continue with Magic Link or Password (based on your default choice)
Summary
- Go to your app settings to enable or disable login options.
- Select the default method for Email and Google login.
- Toggle Microsoft and Facebook login on or off as needed.
- Your users will see only the login options you have enabled, making sign-in easy and secure.