Step 1: Activate Visual Edit Mode
Begin by opening your app’s builder interface on your desktop. Look for the finger icon located at the bottom left corner of the screen. Clicking this icon will activate the Visual Edit Mode, enabling you to click on and edit elements directly within the app preview.
Step 2: Select the Area You Want to Edit
With Visual Edit Mode active, simply click on the part of your app preview you want to modify. This action opens the editing options specific to that element, allowing you to customize it instantly.
Step 3: Use the Item Edit Menu
Once you’ve selected an element, the item edit menu will appear on the left side of your screen. Here, you can adjust the content such as text, colors, fonts, sizes, spacing, and other advanced settings to tailor the element exactly how you want it.
Step 4: Explore More Editing Abilities
Dig deeper into the advanced options to fine-tune your design. You can modify font size, weight, decoration, alignment, text transformation, spacing, and other styling features to perfectly customize your app’s visual elements.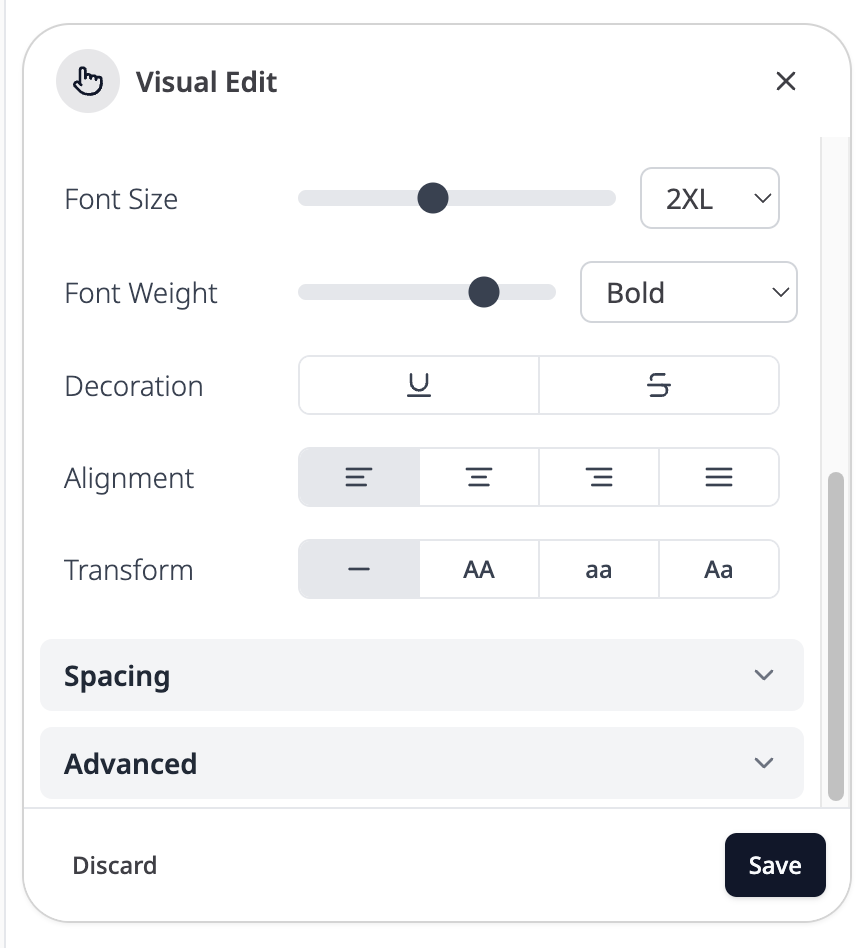
Summary
- The App Visual Editor is available on desktop, providing a convenient workspace to edit your app visually.
- Click the finger icon at the bottom left corner to activate Visual Edit Mode.
- Click any element in your app preview to open its editing options.
- Use the left-side menu to adjust content, colors, fonts, sizes, spacing, and more.
- Explore advanced styling options to customize your app’s look precisely and efficiently.